
Cheap Fixes That Make Your Monitors Sound Better (Stands, Pads, and Controllers)
You do not need new monitors to make your setup sound better. Most of the time, the problem is where they sit, how they touch the desk, and how you control the volume.
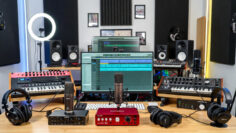
We asked artists in the Exposed Vocals community what they actually use in small rooms and home studios. These are the cheap “fixes” that keep coming up: simple stands, isolation pads, and passive monitor controllers that clean up the sound and make mixing easier.
Quick Fixes Table
| Fix Type | Product | Why It Helps | Price Range | Buy It |
|---|---|---|---|---|
| Monitor Stands (Floor) | Rockville RVSM1 Pair of Near-Field Studio Monitor Stands | Gets your speakers off the desk and up to ear level, with foam on top to cut down vibration | $60–$80 | Buy on Amazon → |
| Monitor Stands (Desktop) | Gator Frameworks Desktop Clamp-On Studio Monitor Stands (Pair) | Clamps to your desk, raises monitors to ear height, and tilts them toward you for a better stereo picture | $99–$119 | Buy on Amazon → |
| Isolation Pads | Auralex MoPAD Monitor Isolation Pads | Decouples speakers from the desk or stand so low end does not shake the surface and blur the sound | $35–$50 | Buy on Amazon → |
| Isolation Pads (For Larger Monitors) | Auralex MoPAD-XL Monitor Isolation Pads | Bigger version of the MoPADs for heavier monitors, same idea: reduce vibration and clean up the low end | $55–$80 | Buy on Amazon → |
| Monitor Controller | Mackie Big Knob Passive Studio Monitor Controller | Gives you a big volume knob and easy A/B between two sets of monitors without adding extra noise | $65–$85 | Buy on Amazon → |
| Monitor Controller (Budget) | Behringer Monitor1 Passive Stereo Monitor Controller | Strips it down to one big knob and mute / mono buttons so you can set levels away from your interface | $35–$50 | Buy on Amazon → |
1. Fix Your Speaker Height with Stands
The fastest way to make monitors sound better is to put the tweeters at about ear height and aim them at your head. If your speakers are sitting flat on a desk, the sound is bouncing off the desk before it reaches you and the stereo image is not as clear as it could be.
A pair of floor stands like the Rockville RVSM1 lets you raise each monitor to the right height and pull them slightly behind your desk. You can then set up a simple triangle: left speaker, right speaker, and your head roughly the same distance apart.
If you cannot give up floor space, clamp-on stands like the Gator Frameworks desktop stands are an easy win. They get the speakers off the desk surface and let you tilt them down toward your ears, which makes panning and reverb placement much easier to judge.
2. Decouple Your Speakers with Isolation Pads
Even with stands, your monitors are still touching something solid. When they fire, that surface can vibrate. That vibration adds a kind of extra “rumble” that has nothing to do with your mix. It is just the table or stand shaking.
Monitor isolation pads are just dense foam wedges that sit between the speaker and the surface. Something like Auralex MoPADs keeps that energy from traveling into the desk, so the low end tightens up and the mid range is easier to trust.
If you are running larger monitors, the MoPAD-XL version gives you more surface area and support. The angle shims they include let you tilt the speakers slightly up or down, which helps if your desk is lower or higher than you would like.
3. Get a Real Volume Knob with a Passive Monitor Controller
A lot of artists control their speaker volume from the tiny knob on the interface or from the master fader inside the DAW. That technically works, but it is not ideal. You want a repeatable listening level that you can hit every time without guessing.
A passive monitor controller sits between your interface and your speakers and gives you a big, physical knob for volume. Because it is passive, it does not add extra color or noise. The Mackie Big Knob Passive is a favorite because it also lets you switch between two sets of speakers and two input sources.
If you just need the knob and a few simple buttons, the Behringer Monitor1 is a cheaper option. It gives you mute and mono switches so you can check balances quickly without reaching for the mouse.
Where to Start If You Are on a Budget
- If your speakers are on the desk: Start with isolation pads. You will feel the difference in the low end right away.
- If your speakers are too low or too high: Go for stands next and get the tweeters lined up with your ears.
- If you keep fighting your volume level: Add a passive controller so you can set a “go to” listening level and stick to it.
None of these upgrades are as exciting as buying new monitors, but they are often what separates a muddy bedroom setup from something that actually translates when you get your music out into the world.